CloudFlare Warp 激活
使用本教程,您可以绕过 Google 和 Spotify 等大公司对您的 IP 施加的某些限制,并无问题地使用它们的服务。
请注意,Warp 配置最多支持 5 个设备同时连接。要解决此问题,您可以使用多个配置。
步骤 1:创建 Wireguard 配置
方法 1:使用 Windows
- 首先,从 releases 部分下载所需的
Asset。此文件因您的处理器而异。 - 将
Asset文件重命名为wgcf。 - 现在在文件资源管理器地址栏中输入
cmd.exe。
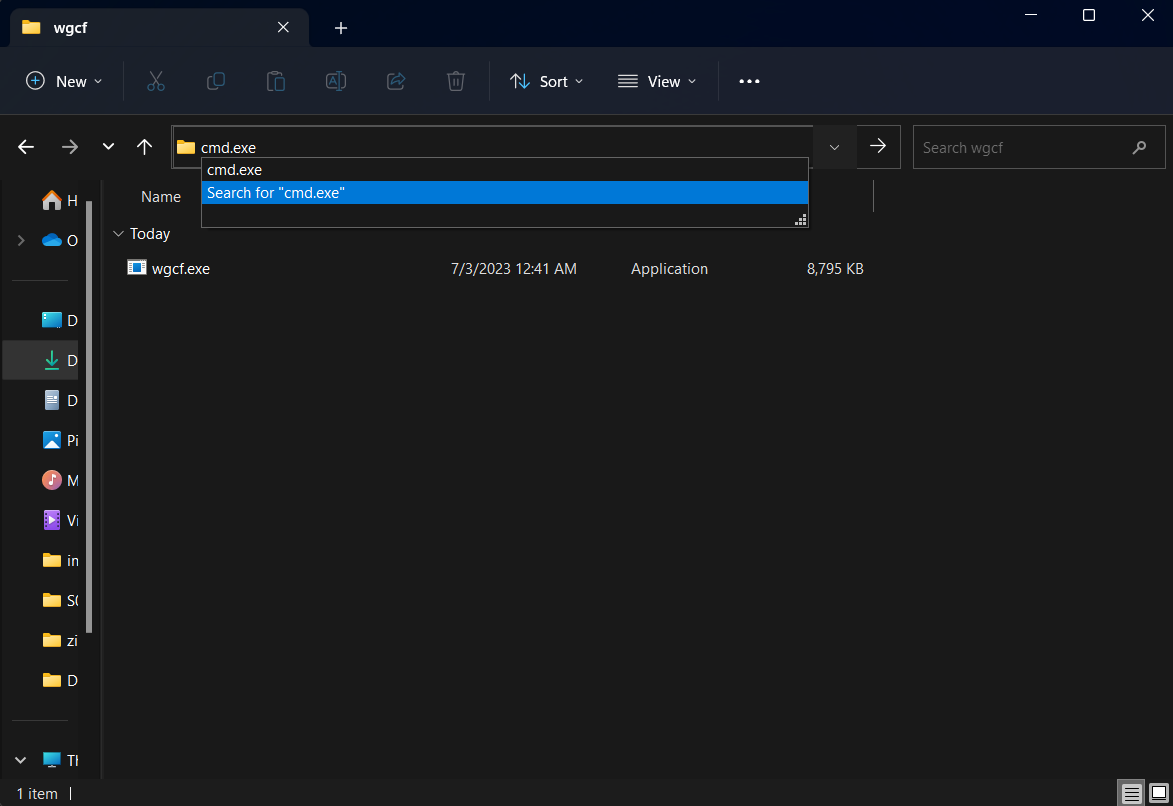
- 在打开的终端中,输入
wgcf.exe。 - 执行
wgcf.exe register一次,然后执行wgcf.exe generate。 - 将创建一个名为
wgcf-profile.conf的新文件 - 这就是我们需要的Wireguard配置。 - 您的配置已准备就绪,您可以使用它。
方法 2:使用 Linux
首先,从 releases 部分下载所需的 Asset。此文件因您的处理器而异。
您可以使用 wget 命令执行此操作。
对于 AMD64 架构处理器:
wget https://github.com/ViRb3/wgcf/releases/download/v2.2.22/wgcf_2.2.22_linux_amd64对于 ARM64 架构处理器:
wget https://github.com/ViRb3/wgcf/releases/download/v2.2.22/wgcf_2.2.22_linux_arm64将文件移动到 /usr/bin/ 并将其重命名为 wgcf。
对于 AMD64 架构处理器:
mv wgcf_2.2.22_linux_amd64 /usr/bin/wgcf
chmod +x /usr/bin/wgcf
对于 ARM64 架构处理器:
mv wgcf_2.2.22_linux_arm64 /usr/bin/wgcf
chmod +x /usr/bin/wgcf
然后使用这 2 个命令创建配置:
wgcf register
wgcf generate
将创建一个名为 wgcf-profile.conf 的文件 - 这就是我们需要的配置。
步骤 2:使用 Warp+(可选)
要获取许可证并使用 Warp+,您可以通过这个 Telegram 机器人获取 license_key。
获取 license_key 后,您需要在 wgcf-account.toml 文件中替换它。
您可以在 Linux 中使用 nano 进行此更改,在 Windows 中使用 Notepad 或任何其他软件。
Windows
要在 Windows 上使用命令,您需要使用 wgcf.exe 而不是 wgcf。
然后更新配置信息:
wgcf update然后创建一个新的配置文件:
wgcf generate步骤 3:在 PasarGuard 中激活 Warp
方法 1:使用 Xray Core
- 此方法仅推荐用于 Xray 版本 1.8.3 或更高版本。在较旧的版本中,您可能会遇到内存泄漏问题。
- 如果您的
Xray版本低于此版本,您可以使用 Xray-core 版本更改教程升级您的Xray版本。
转到 PasarGuard 面板中的 Core Setting。
首先,添加一个像示例一样的 outbound,并将 wgcf-profile.conf 文件信息放入其中。
{
  "tag": "warp",
  "protocol": "wireguard",
  "settings": {
    "secretKey": "Your_Secret_Key",
    "DNS": "1.1.1.1",
    "address": ["172.16.0.2/32", "2606:4700:110:8756:9135:af04:3778:40d9/128"],
    "peers": [
      {
        "publicKey": "bmXOC+F1FxEMF9dyiK2H5/1SUtzH0JuVo51h2wPfgyo=",
        "endpoint": "engage.cloudflareclient.com:2408"
      }
    ],
    "kernelMode": false
  }
}
如果您希望默认情况下所有流量都通过 Warp,请将此 Outbound 放在首位,您无需执行下一步。
Xray WireGuard Outbound 的 Docker 配置:
如果您使用 Docker 运行 PasarGuard Node,请在 docker-compose.yml 文件中添加以下内容,以使 WireGuard outbound 正常工作:
    devices:
      - /dev/net/tun:/dev/net/tun
    security_opt:
      - seccomp=unconfined
      - systempaths=unconfined
      - apparmor=unconfined
方法 2:使用 Wireguard Core
首先,在服务器上安装 Wireguard 先决条件:
sudo apt install wireguard-dkms wireguard-tools resolvconf如果您使用的是 Ubuntu 24,请使用以下命令安装 Wireguard:
sudo apt install wireguard然后将 Table = off 添加到 Wireguard 文件中,如示例所示:
[Interface]
PrivateKey = Your_Private_Key
Address = 172.16.0.2/32
Address = 2606:4700:110:8a1a:85ef:da37:b891:8d01/128
DNS = 1.1.1.1
MTU = 1280
Table = off
[Peer]
PublicKey = bmXOC+F1FxEMF9dyiK2H5/1SUtzH0JuVo51h2wPfgyo=
AllowedIPs = 0.0.0.0/0
AllowedIPs = ::/0
Endpoint = engage.cloudflareclient.com:2408
如果您不添加 Table = off,您的服务器访问将被切断,您将无法连接到服务器。您需要通过数据中心的网站访问服务器并断开与 Warp 的连接,才能再次建立正常连接。
然后将文件从 wgcf-profile.conf 重命名为 warp.conf。
将文件放在服务器上的 /etc/wireguard 文件夹中:
sudo mv wgcf-profile.conf /etc/wireguard/warp.conf使用以下命令启用 Wireguard:
sudo systemctl enable --now wg-quick@warp您也可以使用此命令禁用 Warp:
sudo systemctl disable --now wg-quick@warp转到 PasarGuard 面板中的 Core Setting。
首先,添加一个像示例一样的 outbound:
{
  "tag": "warp",
  "protocol": "freedom",
  "streamSettings": {
    "sockopt": {
      "tcpFastOpen": true,
      "interface": "warp"
    }
  }
}
如果您希望默认情况下所有流量都通过 Warp,请将此 Outbound 放在首位,您无需执行下一步。
步骤 4:路由配置
首先,在 routing 部分添加一个 rule,如示例所示:
{
  "outboundTag": "warp",
  "domain": [],
  "type": "field"
}
现在添加您想要的网站,如示例所示:
{
    "outboundTag": "warp",
    "domain": [
        "geosite:google",
        "openai.com",
        "ai.com",
        "ipinfo.io",
        "iplocation.net",
        "spotify.com"
    ],
    "type": "field"
}
保存更改 - 您现在可以使用 Warp。
PasarGuard Node
- 如果您使用 xray 核心的
Warp,则无需对节点进行更改 - 它将自动应用。 - 如果您使用
Wireguard核心,则还需要在节点上执行步骤三,方法二。