CloudFlare Warp Activation
CloudFlare Warp Activation
Using this tutorial, you can bypass certain restrictions imposed by large companies like Google and Spotify on your IP and use their services without issues.
Note that Warp configs have a maximum connection limit of 5 simultaneous devices. To solve this issue, you can use multiple configs.
Step 1: Creating Wireguard Config
Method 1: Using Windows
- First, download the required
Assetfrom the releases section. This file varies depending on your processor. - Rename the
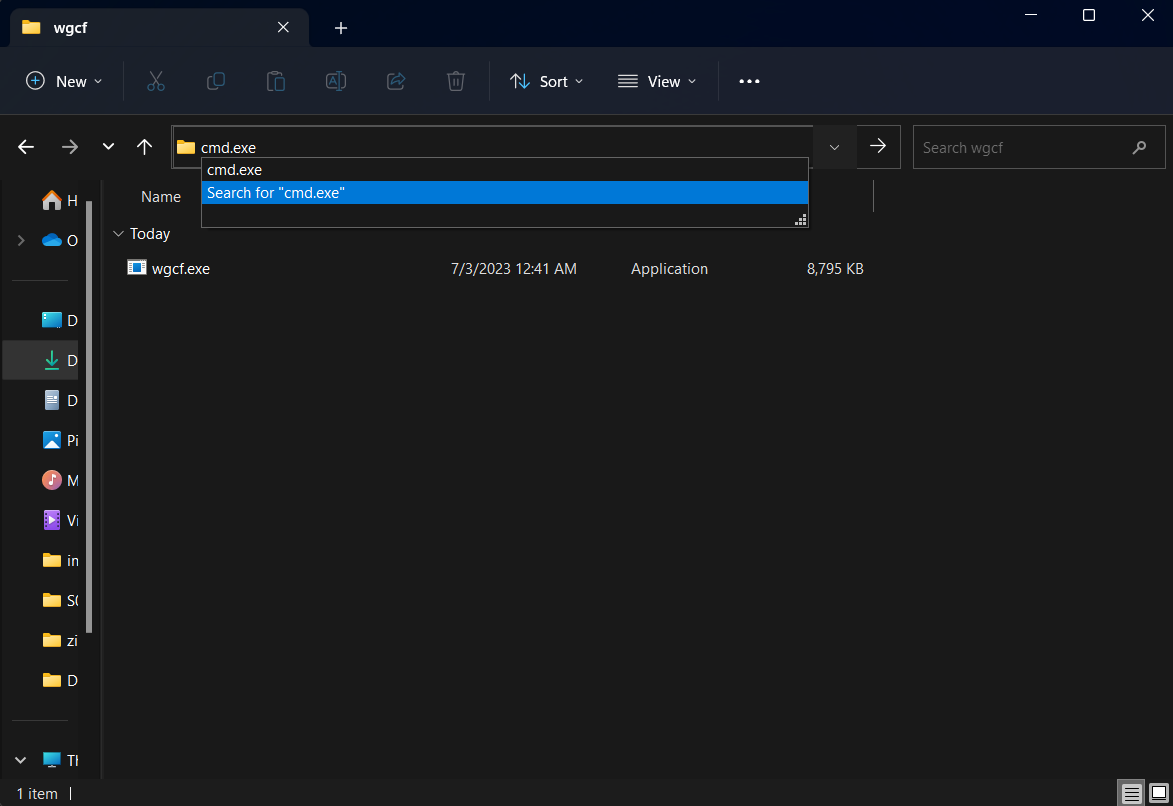
Assetfile towgcf. - Now enter
cmd.exein the File Explorer address bar.
- In the opened terminal, enter
wgcf.exe. - Execute
wgcf.exe registeronce, thenwgcf.exe generate. - A new file named
wgcf-profile.confwill be created - this is theWireguardconfig we need. - Your config is ready and you can use it.
Method 2: Using Linux
First, download the required Asset from the releases section. This file varies depending on your processor.
You can do this using the wget command.
For AMD64 architecture processors:
wget https://github.com/ViRb3/wgcf/releases/download/v2.2.22/wgcf_2.2.22_linux_amd64For ARM64 architecture processors:
wget https://github.com/ViRb3/wgcf/releases/download/v2.2.22/wgcf_2.2.22_linux_arm64Move the file to /usr/bin/ and rename it to wgcf.
For AMD64 architecture processors:
mv wgcf_2.2.22_linux_amd64 /usr/bin/wgcf
chmod +x /usr/bin/wgcf
For ARM64 architecture processors:
mv wgcf_2.2.22_linux_arm64 /usr/bin/wgcf
chmod +x /usr/bin/wgcf
Then create the config using these 2 commands:
wgcf register
wgcf generate
A file named wgcf-profile.conf will be created - this is the config we need.
Step 2: Using Warp+ (Optional)
To obtain a license and use Warp+, you can get a license_key through this Telegram bot.
After obtaining the license_key, you need to replace it in the wgcf-account.toml file.
You can make this change in Linux with nano and in Windows with Notepad or any other software.
Windows
To use commands on Windows, you need to use wgcf.exe instead of wgcf.
Then update the config information:
wgcf updateThen create a new config file:
wgcf generateStep 3: Activating Warp on PasarGuard
Method 1: Using Xray Core
- This method is only recommended for Xray version 1.8.3 or higher. In older versions, you may encounter Memory Leak issues.
- If your
Xrayversion is lower than this, you can upgrade yourXrayversion using the Xray-core version change tutorial.
Go to Core Setting in the PasarGuard panel.
First, add an outbound like the example and place the wgcf-profile.conf file information in it.
{
  "tag": "warp",
  "protocol": "wireguard",
  "settings": {
    "secretKey": "Your_Secret_Key",
    "DNS": "1.1.1.1",
    "address": ["172.16.0.2/32", "2606:4700:110:8756:9135:af04:3778:40d9/128"],
    "peers": [
      {
        "publicKey": "bmXOC+F1FxEMF9dyiK2H5/1SUtzH0JuVo51h2wPfgyo=",
        "endpoint": "engage.cloudflareclient.com:2408"
      }
    ],
    "kernelMode": false
  }
}
If you want all traffic to pass through Warp by default, place this Outbound first and you don't need to perform the next step.
Method 2: Using Wireguard Core
First, install the Wireguard prerequisites on the server:
sudo apt install wireguard-dkms wireguard-tools resolvconfIf you're using Ubuntu 24, use the following command to install Wireguard:
sudo apt install wireguardThen add Table = off to the Wireguard file as shown in the example:
[Interface]
PrivateKey = Your_Private_Key
Address = 172.16.0.2/32
Address = 2606:4700:110:8a1a:85ef:da37:b891:8d01/128
DNS = 1.1.1.1
MTU = 1280
Table = off
[Peer]
PublicKey = bmXOC+F1FxEMF9dyiK2H5/1SUtzH0JuVo51h2wPfgyo=
AllowedIPs = 0.0.0.0/0
AllowedIPs = ::/0
Endpoint = engage.cloudflareclient.com:2408
If you don't add Table = off, your server access will be cut off and you won't be able to connect to the server. You'll need to access the server through your datacenter's website and disconnect from Warp to be able to establish a normal connection again.
Then rename the file from wgcf-profile.conf to warp.conf.
Place the file in the /etc/wireguard folder on the server:
sudo mv wgcf-profile.conf /etc/wireguard/warp.confEnable Wireguard with the following command:
sudo systemctl enable --now wg-quick@warpYou can also disable Warp with this command:
sudo systemctl disable --now wg-quick@warpGo to Core Setting in the PasarGuard panel.
First, add an outbound like the example:
{
  "tag": "warp",
  "protocol": "freedom",
  "streamSettings": {
    "sockopt": {
      "tcpFastOpen": true,
      "interface": "warp"
    }
  }
}
If you want all traffic to pass through Warp by default, place this Outbound first and you don't need to perform the next step.
Step 4: Routing Configuration
First, add a rule in the routing section like the example:
{
  "outboundTag": "warp",
  "domain": [],
  "type": "field"
}
Now add your desired websites like the example:
{
    "outboundTag": "warp",
    "domain": [
        "geosite:google",
        "openai.com",
        "ai.com",
        "ipinfo.io",
        "iplocation.net",
        "spotify.com"
    ],
    "type": "field"
}
Save the changes - you can now use Warp.
PasarGuard Node
- If you're using
Warpwith the xray core, you don't need to make changes to the node - it will be applied automatically. - If you're using the
Wireguardcore, you need to perform step three, method two on the node as well.